Setting up Vision Links Smartphone Community Application

To get our award winning smartphone technology up and running on your devices please follow these simple steps below.

Vision Link develop all its software and smartphone application in-house so if you have any questions / comments please do not hesitate to contact us with feedback or suggested improvements.

Step 2 : Installing the Smartphone Application

Android / Google Play Store Version

iOS / Apple Store Version

Step 3 : Step Smartphone Application Permissions

The Vision Link smartphone applications need some permissions to work properly.

  • Access to the devices GPS location. This is used so the application knows which cameras and level sensors are most reliant to the user.
  • The ability to write to the devices photo folder. Users can save camera images direct to their devices if need. This allows images to be emailed or shared on social media.
  • Receive PUSH Notifications. Vision Link uses something called PUSH notifications which is a bit like text messages, these are used to send messages and water level alerts direct to the smartphone application

Typical Smartphone Requests to Allow Permission

When the application runs for the first time it will display the following disclaimer.

Step 4 : Pairing the Smartphone Application

So the smartphone application knows which cameras and water level sensors to show our lovely customers, it needs a pairing code.

This code allows the smartphone to request the relevant camera and level sensor data from our server.

Paring codes are available from the local flood group, Environment Agency, County Council or Vision Link Ltd

Step 5 : Adding Cameras / Water Level Sensors

The first time the application is run it will not show any cameras or water level sensors on the home screen until the user adds these to their follow list.

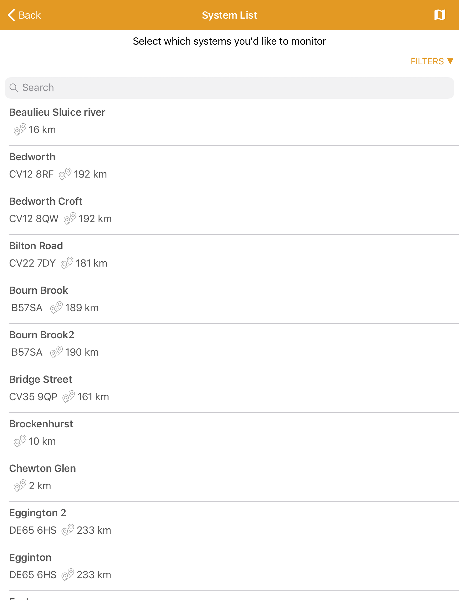
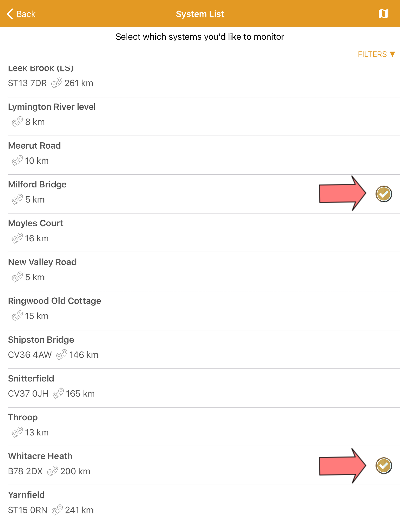
Additional filters can be applied to the list by pressing the ‘FILTERS’ button. This will display a drop down filter box.

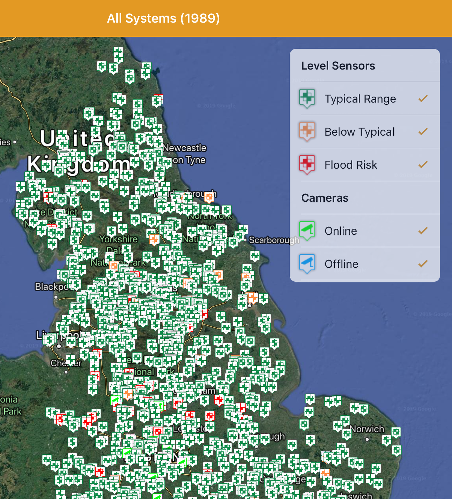
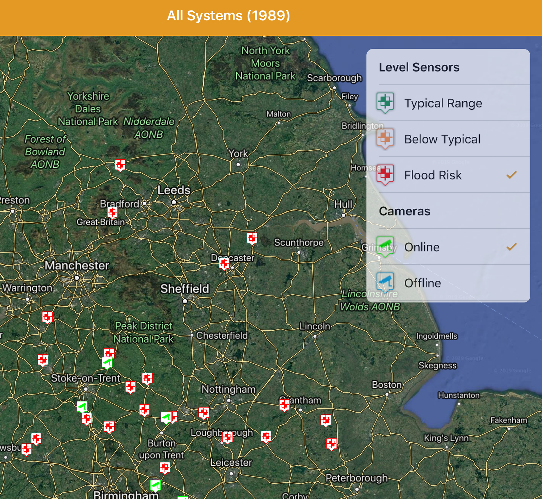
The first filter is a switch to disable / remove  the Environment Agency water level sensors from the list. This can be turned back on at anytime.

The next filter is a slider that selects the sensors to be included from the users current GPS location.

The last filter allows the user to change the order in which the cameras / sensors are displayed.

When the user presses the ‘ADD SYSTEMS’ button the app will display a list of available cameras and water level sensors.

Users can select any camera or water level sensor from the list to view images or water level trends.

Users can follow water level sensors or cameras by pressing the ‘FOLLOW’ button. This will add the camera and water level sensors to the users home screen.

Once a camera or level sensor has been followed by a user the smartphone application can then receive warning notifications and messages. 

Step 6 : Adding Multiple Cameras / Water Level Sensors

Once a camera / water level sensors has been viewed or followed the user can return to the main list of cameras / water level sensors available by pressing the ‘Back’ button.

If the user wants to view or follow additional cameras / water level sensors they can select these systems from the list and add them to their home screen.

Any cameras or water level sensors that have been followed by the user will have a tick next to their name.

Step 7 : Viewing the Home Screen

Once the user has selected one or several cameras / water level sensors to follow the home screen will display important information about the systems being followed.

Pressing the camera or water level sensor box will immediately open up the camera image or water level sensor page.

Step 8 : Example Water Level Graphs

Users can touch any data point on the graph to display the water level and time / date stamp of the reading.

The interactive graph also allows users to zoom in for more detailed data points.

Addition Smartphone Features

Users can view colour coded icons for all available cameras and level sensors. The filter box on the right hand side allows users to remove particular icon groups from the map display.